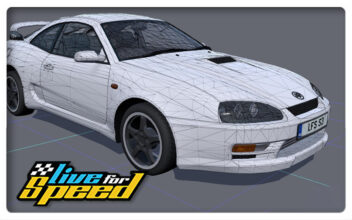
Live For Speed Test Patch 0.6E16
After a long wait, Lead programmer Scawen has released a new live for speed test patch. This 0.6E16 LFS patch features a bunch of new features. The most noticeable are the use of DirectX 9 graphics, Oculus Rift virtual reality headset support and stereoscopic 3D support for a selection of 3D TVs and monitors.
With the use of DirectX 9 it seems that for a lot of users it generates a frame-rate improvement. As usual the patch also contains a load of bug fixes and various improvements. You can find a full list of changes below. Please note that before applying the patch a full version of LFS 0.6E must already be installed.
TEST PATCH 0.6E15 (now E16 – DirectX 9 + 3D / VR support)
NOTE : THIS DOES NOT CONTAIN NEW TYRE PHYSICS / VW SCIROCCO / ROCKINGHAM
Hello Racers, here is a new TEST PATCH : 0.6E16
This test patch is fully compatible with version 0.6E
It now uses DirectX 9
There are not many graphical changes yet but some people report better frame rates
Mirror antialiasing has been implemented (Options – Graphics)
Screenshots can now be saved in bmp / jpg / png format (Options – Misc)
The Oculus Rift and many 3D TVs and monitors are now supported
See “How to enable stereoscopic 3D” below
You cannot upload hotlaps made with this test patch because it is only a test patch, not an official patch
Please keep a backup of your LFS.exe from 0.6E so you can easily go back if there are any problems
Changes from 0.6E15 to 0.6E16 :
- The 3D support is now translatable – awaiting translations
- Improved and optimised the Oculus Rift distortion function
- Some other small performance optimisations in graphics code
- FIX : Mouse drag movement in SHIFT+U mode in 3D modes
Changes from 0.6E14 to 0.6E15 :
DirectX 9 :
A helpful message is now shown at start if DirectX needs updating
Misc option to select CTRL+S screenshot format (bmp / jpg / png)
- FIX : Vertical sync was enabled in windowed mode – now disabled
- FIX : Crash when using FRAPS or when another program went full screen
3D Support :
- Options for 3D modes are displayed in a dialog before going 3D
Oculus Rift :
- 24-bit Z-buffer is now used if Z-buffer depth graphics option is 24/32
- Full-scene AA option disabled in Rift mode (use special Rift AA option)
- Wide screen effect option is now disabled in Oculus Rift mode
Commands :
- /refresh refreshes list of setups / hosts / replays
- /setup now works correctly (loads setup) in garage screen
- /join hostname from entry screen now tries to join the named host
- /exec and /wait can now take filenames with spaces in quotes
- /colour and /setup without a parameter now select default
Fixes for new bugs :
- FIX : Driver selection buttons clashed in first time driver screen
- FIX : Race setup screen objects sometimes visible in other screens
Fixes for old bugs :
- FIX : Text entry was not always cleared when entering the meeting room
- FIX : F key text was delayed if pressed in warning or selection dialog
- FIX : Some controllers could make mouse axes unavailable for use
Changes from 0.6E to 0.6E14 :
- New Graphics Option : Mirror antialiasing
- LFS now uses DirectX 9 instead of DirectX 8.1 (no visual changes)
- Support for stereoscopic 3D monitors, projectors, TVs and headsets
- Lateral and longitudinal accelerometer values now work realistically
- CTRL+ and ALT+ (assign text to F keys) visible in mouse / kb mode
- Improved transitions when switching between interface screens
Fixes for old bugs :
- FIX : MAX ALPHA (unsorted) message after adding 900 chalk objects
- FIX : LFS would crash if more than 8 game controllers were connected
- FIX : Alt+F4 / X button from SHIFT+U mode after editing got stuck in game
- FIX : Some glitches in the movement of vertical sliders
- FIX : Cleaner transition from track selection back to race setup screen
- FIX : High frequency changes in acceleration were filtered in OutSim
- FIX : Helmet stayed the same after changing driver in MP replays
- FIX : Setup could sometimes be corrupted when joining – now spectated
- FIX : NumConns was set to zero after disconnecting from an online host
- FIX : Arrow keys in input dialog were re-enabled by code page selector
HOW TO ENABLE STEREOSCOPIC 3D :
1) At the top of the View options screen, select 3D mode.
2) Select your Display type – three options are available :
- – TV / monitor / projector
- – Conventional 3D headset
- – Oculus Rift
Each mode has different characteristics.
– TV / monitor / projector mode – it is important to set your horizontal screen width, measured in mm. Not the diagonal, just the horizontal measurement from one side to the other. This, in conjunction with the interpupillary distance, should set the image up properly if you set the FOV to match the true horizontal view angle between your eyes and the TV edges. The virtual eye positions are affected and the centres of the two images displayed on the screen are offset by the same distance so the horizon appears to be in the distance.
– Conventional 3D headset – also has an interpupillary distance slider but in this case it only affects the virtual eye positions. There is no compensation for the use of wider FOV angles than actually available. So if you use wider FOV than the true horizontal FOV of the device, you will see exaggerated depth.
– Oculus Rift – this will try to load a DLL and connect to your Oculus Rift and from there it will get the interpupillary distance and other values, and head tracking should work.
3) In TV / monitor / projector or Conventional 3D headset modes, select your Format for 3D output – four options are available :
- – side by side (half)
- – top and bottom (half)
- – side by side (full)
- – top and bottom (full)
Choose the setting that works with your device. Many devices can accept different input formats.
– side by side (half) is a commonly used format that causes some loss of resolution in the horizontal direction.
– top and bottom (half) causes loss of resolution in the vertical direction. This is the best choice for passive displays with alternating polarisation horizontal scan lines. This type of display discards half of the lines if supplied with a full height image. When supplied with half height images, no further information needs to be discarded.
– side by side (full) and top and bottom (full) can output 3D at full HD resolution to a device that supports this. However, most devices do not support this output (even if they can accept full HD 3D from a Blu-ray player). In Windows XP it was possible to set your desktop across two screens and then LFS could go full screen on two screens. Then side by side (full) could be used, for example, to send output to a twin projector 3D setup. Unfortunately this possibility seems to have been removed from recent versions of Windows.
4) For Oculus Rift mode some text functions have been included.
- /rift reset – reset the orientation
- /rift on – switch on 3D with Oculus Rift as the display type
- /rift off – return to 2D mode
- /rift toggle – switch Oculus Rift mode on or off
The /rift reset command is automatically assigned to ALT+F12
The /rift toggle command is automatically assigned to ALT+F11
You can assign ALT+F11 and ALT+F12 to wheel buttons under the ALT+ tab in the controls options screen.
5) Screen resolutions for your Oculus Rift.
Now that LFS adjusts the render target texture size to suit the output screen size, you may benefit from downsampling if you select a higher screen resolution than the native resolution of the Rift. This may produce some helpful antialiasing. Try to select a 16:10 resolution (e.g. 1920×1200) because that has the same aspect ratio as the Dev Kit’s native resolution (1280×800). If you select a 16:9 resolution (e.g. 1920×1080) you should check carefully that the output image has the correct aspect ratio. This seems to vary between computers. Some have reported that the image looks the same in 1920×1200 and 1920×1080 but others report that 1920×1080 causes the image to be slightly stretched vertically. You need to make sure the dimensions appear the same as when you choose the native resolution of 1280×800. If you find the image is stretched vertically when you use 1920×1080, you can try the Aspect ratio correction option, or look at the GPU scaling setting (in your graphics card driver software).
There is a device selector in LFS which may allow you to put LFS on the Rift without it appearing on your monitor, and to do this without touching any Windows desktop settings. This is probably available when your desktop is set to extended mode. Using the device selector may make more modes available to you than when you use cloned mode.
At the bottom of the Graphics Options screen, just above the Z-buffer depth option, there is a button which has the name of your graphics card. If you click that button you may be able to select the Oculus Rift device which will be used the next time you start LFS.
NOT YET DONE (some of these will be done) :
- – render mirrors in 3d
- – chromatic aberration correction
- – allow head tracking and wheel button instead of mouse
- – replay cameras (TV view) may be put on a virtual monitor
- – include object selection buttons in SHIFT+U mode
INSTALLATION INSTRUCTIONS :
A full version of LFS 0.6E must already be installed
- – Download the test patch (below). It contains an LFS exe and a DLL for the Oculus Rift.
- – Open the zip file and drag the specially named LFS exe file into your LFS folder.
- – For Oculus Rift support copy LFSOVRDLL.dll (new version) into your LFS folder.
NOTE : You can see if the patch is correctly installed when you run
the program. At the bottom of the entry screen : 0.6E16
DOWNLOAD:
TEST PATCH 0.6E16 (if you already have 0.6E) :
www.lfs.net/file_lfs.php?name=LFS_6E16.zip (1.0 MB)
| Official Webpage – http://www.lfs.net/ |