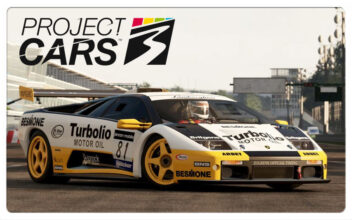
Project CARS community Liveries showcase video by JonZ
The WMD members of the Project CARS forum have always been encouraged to be creative partners. Slightly mad Studios is allowing all Team Members to include their favorite designs in the game. During the development of the project, the WMD community showed its appreciation by creating a large amount of astonishing custom car liveries, representing both fantasy and real world artwork.
In this short movie by JonZ,some of the best Project CARS community made liveries for a wide selection of vehicles are showcased. You can watch these works of art while the cars are on the track. All footage of this video is recorded from actual gameplay.
(Music: The Dark Knight by Hans Zimmer.)
For those who want to have a go at painting their own livery, and do not yet understand how, Slightly Mad Studios provided a very handy FAQ file explaining some basics to get you started.
Vehicle custom liveries – How to + FAQ
What do I need?
1. Photoshop CS (or higher) or any other software (e.g. GIMP) that can deal with PSD and DDS file types.
2. If your software does not support DDS files out of the box you need this plugin: http://developer.nvidia.com/nvidia-t…dobe-photoshop
3. A bit of knowledge how to use Photoshop, GIMP or whatever software you chose.Where do I find the custom textures?
In your pCARS runtime under “[your drive]:\[your system]\STEAM\SteamApps\common\pCars\Vehicles\Textures\CustomLiveries” you will find default custom liveries for all cars.
They are all white and show a black wireframe.
Simply replace these textures with your own and choose the “Custom Livery” in the GUI selection.Will my liveries be deleted when I uninstall the game or install a new version?
We’ve changed the installer to not replace the files if they’re already present, or uninstall them if they’ve been modified from the defaults, so it should be fairly safe.
But if you blindly delete your whole pCARS folder say, you’ll lose them.
So you better keep the PSD files of your liveries somewhere safe.
Later in the project we will move the liveries to the “My Documents” folder, where the profile is. But that won’t happen soon.I don’t have the above folder and textures! Where are they?
This will only be available in next build, Friday 17th February.Why are there PLAYER and AI liveries for each car?
PLAYER livery is the High Res one, that is only used if the player uses the “Custom Livery”.
AI livery is usually smaller. This is the livery if the AI uses the “Custom Livery”.How do I paint my livery in Photoshop or GIMP?
Sorry, but I won’t explain how to use Photoshop here.
There are lots of tutorials out there.How do I find out, which part on the template fits to which part on the car?
Just paint the different parts of the template in different colors, save it as livery, load the game and watch your custom livery.
To keep it in mind save a jpeg of your template and just make ingame-screenshots of different angles.What settings do the liveries need to be saved with?
You save them as simple “DXT1” DDS with all MIP maps.
Set the DDS plugin to “create new mip maps”.
The DDS file should be saved as a square image, so if a PSD file is not square (e.g. 4096×6144 pixels), you first need to resize it to 4096×4096 before exporting it to DDS).I have problems saving the DDS files. What can I do?
Save the livery as TGA.
Then open the TGA and save the DDS from there.
That will usually always work. Sometimes there are problems saving DDS files from layered PSD files.Can we just use one custom livery per car at the same time at the moment?
Yes. For now you can only have 1 custom livery per car.
This will change at a later point in time, so that you can have more custom liveries.Are metallic effects possible?
No, only solid paint is possible at the moment.
The shaders for these effects are too complicated to be externally influenced.
We will find a way for the users to create their own metallic effects later in the project.
However, chrome and matte effects are possible. See specular + fresnel maps at the bottom of these FAQ.Will there be a 3D Viewer?
A 3D viewer is coming as part of the live editing suite. It’s not imminent though so this is better than nothing for now.Can we make 4096x4096px liveries or are we limited by size?
4096x4096px liveries are possible.
Your PC performance and memory is the limit I guess.What can I do with specular maps for liveries?
Specular maps control the specularity and glossyness of the material.
In the RGB channels (normal painting area) you can control how much light gets reflected and what colour it reflects.
Glossy paint materials usually reflect white light, so it would be 255/255/255 white.
For matte or semigloss paint you would choose a grey tone, something around 160/160/160 works well for matte paint.
For the blue chrome (see below) you would choose a bright blue colour.
The alpha channel controls how glossy the material is, i.e. how blurred the emap reflections are.
Greyscale values: White = glossy (sharp reflections), Black = matte (blurry reflections). 20/20/20 works well for matte paint.
The darker the alpha channel, the more blurry the reflections get.
Specular maps have to be saved as DXT5 (with alpha).
See attached screenshot and livery textures as example!What can I do with fresnel maps for liveries?
Fresnel maps control the fresnel value of the paint material, i.e. the amount of reflections per angle.
Detailed explanation here: http://www.3drender.com/glossary/fresneleffect.htm
This is actually the effect that makes paint and glass look realistic.
With the fresnel map you are able to create chrome paint effect like on the McLaren F1 cars.
Greyscale values: White = Paint material, Black/Darkgrey = Chrome
Fresnel maps have to be saved as DXT1 (without alpha).
See attached screenshot and livery textures as example!What size and file formats are recommended?
LIVERY_PLAYER – 2048×2048 – DXT1
LIVERY_AI – 1024×1024 – DXT1
LIVERY_FRESNEL – 1024×1024 – DXT1
LIVERY_SPEC – 1024×1024 – DXT5
WHEEL_DIFF – 512×512 – DXT5
WHEEL_DIFF_BLUR – 256×256 – DXT5
WHEEL_SPEC – 256×256 – DXT5
WHEEL_SPEC_BLUR – 256×256 – DXT5
-> always all MIP maps
Project CARS by Slightly Mad Studios is targeted to be released starting November 2014 for the PC, XBONE, PlayStation 4, Steam OS and WiiU systems.
| Official Webpage – http://www.wmdportal.com – www.projectcarsgame.com |