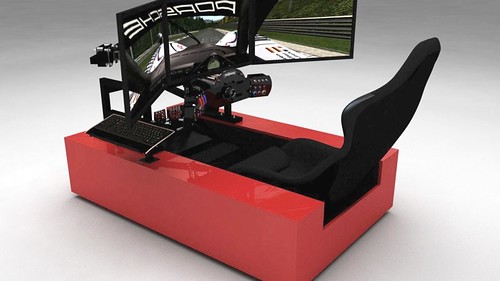
Building a Driving Simulator – Part Two (Gregg Langnese)
Some of you might remember the very interesting “Expansion of a Driving Simulator” , “Anatomy of a Driving Simulator” and “Building a Driving Simulator – Part One” videos by Gregg Langnese. All three videos detailed the concepts and design decisions used in developing his DIY Driving Simulator Cockpit.
Gregg’s design uses tactile feedback at all contact points (seat, pedals, wheel) and is completely self-contained. It took him about 12 weeks to build the simulator rig, costing approximately $800.
Blueprints (free) for the expansion can be found here
After publishing Part one, showing us how to build the base, Gregg promised us a sequel where he continues to describe you how to build the DIY Simulator. This new “Part two video” discusses the monitor rack. Gregg looks at the pro and cons of selecting certain materials and shares some tips & tricks for those who want to build their own rig.
In the near future, Gregg Langnese will provide us with a third video focusing on the custom build steering rack.
Driving Simulator Specifications:
- Height 46″
- Length: 65″
- Width: 60″ (assuming 45 degree monitor rake)
- Weight: 190 lbs. (without monitors)
- Seat travel: 10″ fore and aft, 20 degree tilt in 5 degree increments
- Pedal travel: 12″ fore and aft, 0-30 degree tilt in 5 degree increments (from 10-30 degrees)
- Steering travel: 16″ fore and aft, up to 12″ up and down, 30 degree wheel pitch, 30 degree steering shaft pitch
- Monitor travel: 8″ up and down from center point
- Accommodates up to three 30″ monitors, individual monitor pitch 180 degree, yaw 60 degrees.
| Check out lagnese.me – SRH Dash info at http://simracinghardware.com/ |
 Bsimracing Sim Racing Resources and News for the racing enthousiast.


